After successfully creating my No-Churn Soft Serve Ice Cream recipe, I knew there was more I could do with it.
In creating that recipe, I also came up with a dairy-free version using coconut milk that I happened to love. It was a bit thicker than traditional soft-serve ice cream, which got me thinking… would it work to make a DQ Blizzard?
That answer is a definite YES.

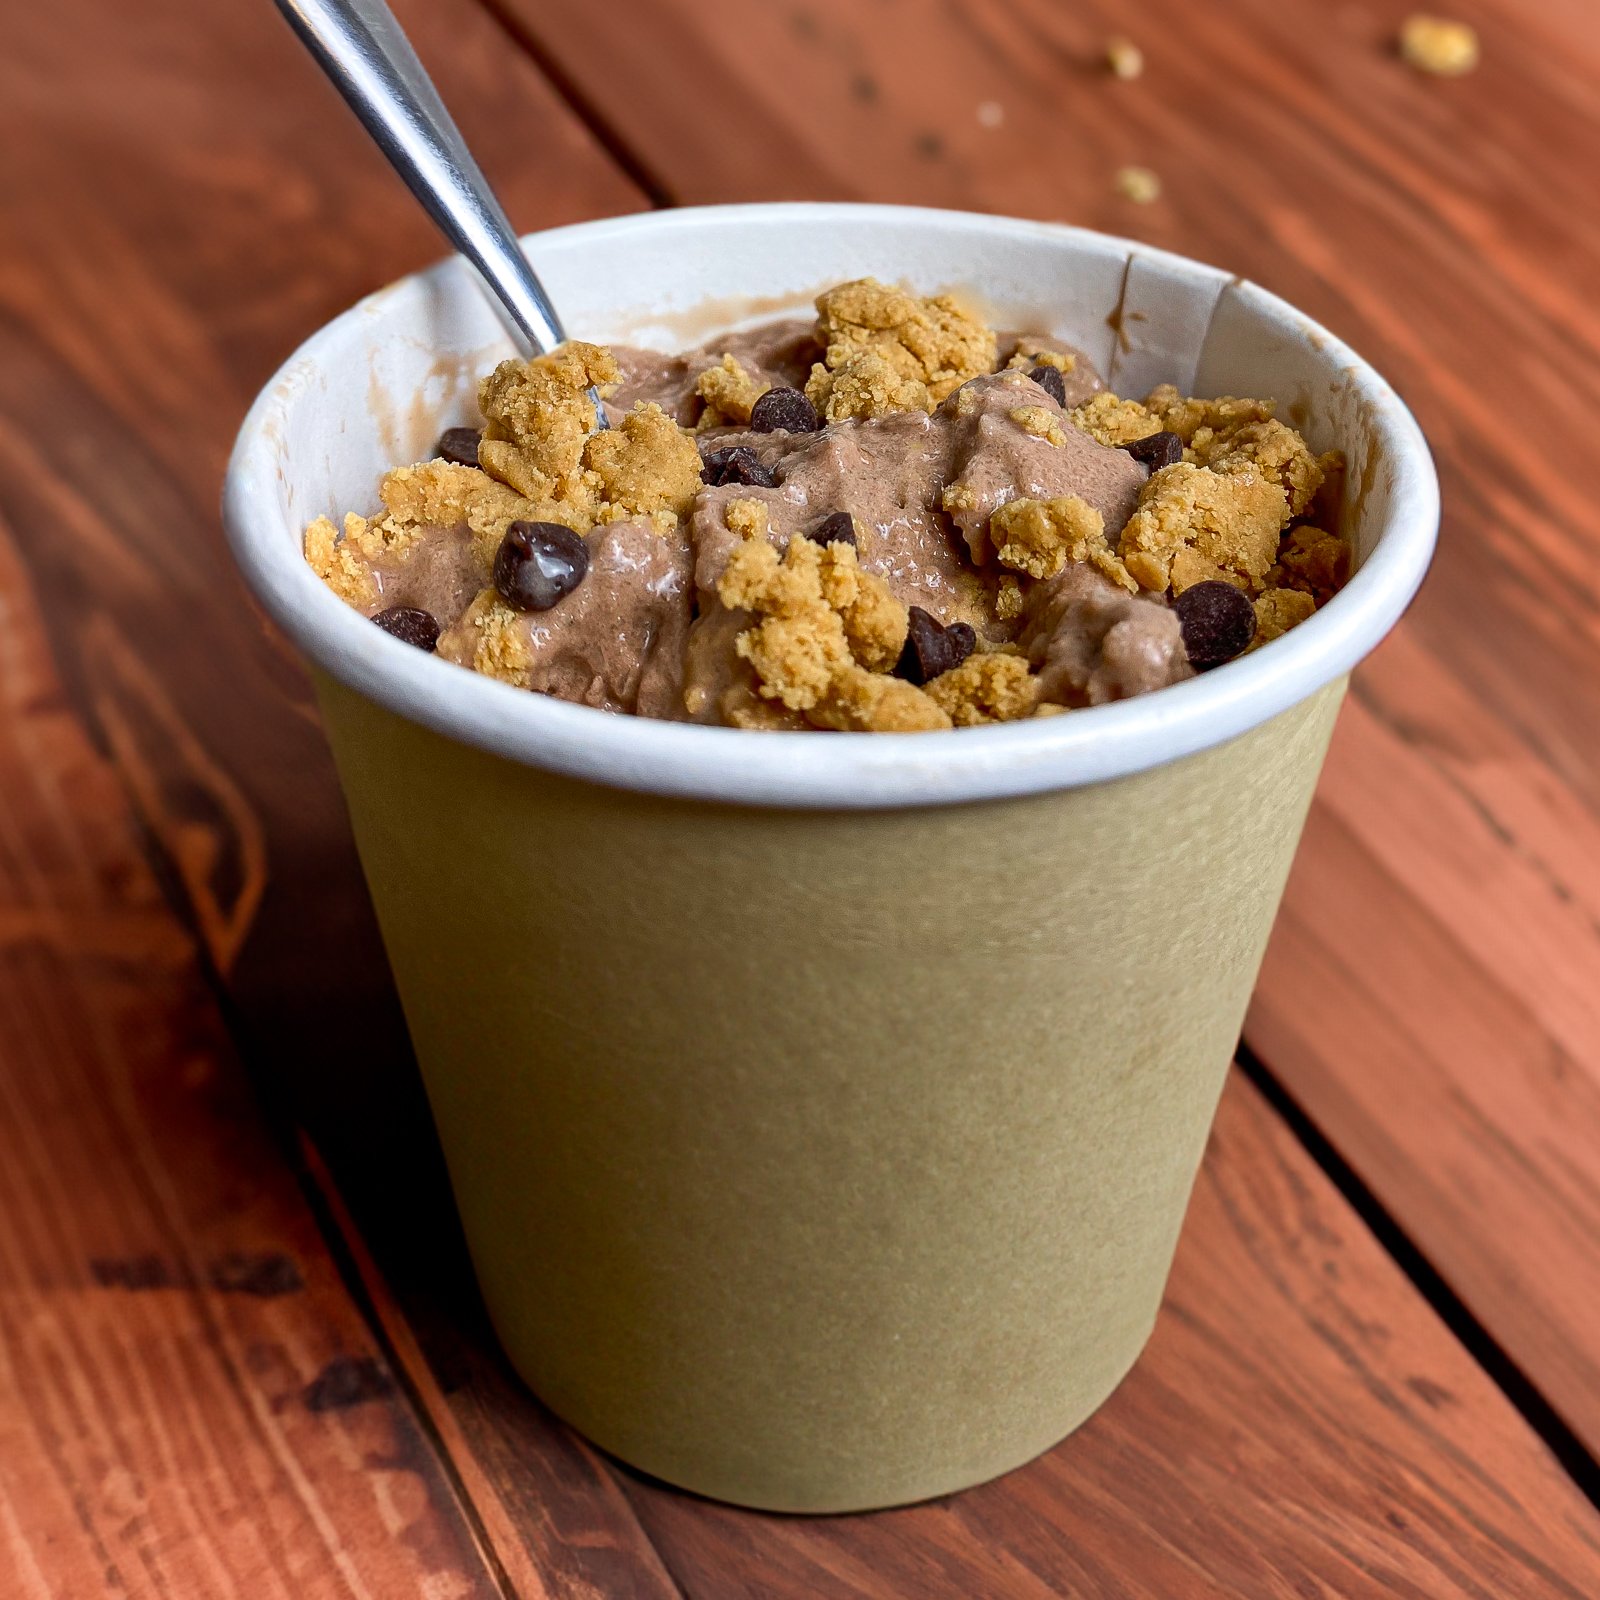
The true test of a DQ Blizzard is being able to turn it upside and everything staying in place, which our version delivers on!
And not to knock DQ, but their Blizzards are crazy high in calories. Our version, while smaller than theirs, has only 250 calories, and even sneakily provides 14g of protein.
I wanted to keep this one completely dairy-free because I know there are tons of people out there who do not tolerate dairy well, and everyone deserves to enjoy ice cream.
Even if you’re not dairy-free, this blizzard is worth making. You wouldn’t even know the difference!
I went with a chocolate ice cream base and a soft peanut butter cookie dough to mix in, but the beauty of this recipe is that it can easily be customized to be any flavor you want.
In my testing, I even went with a fudge brownie version using my Vegan No-Bake Brownies as a mix-in:
Of course, you don’t have to go the chocolate route at all.
Check out my original ice cream recipe (the dairy-free version is included there) if you want to stick with plain ol’ vanilla, then you can get wild and include any mix-ins you want.
Oreo Blizzards, Birthday Cake Blizzards, Waffle Blizzards… it’s a blank canvas for ya.
How to make dairy-free chocolate ice cream
This ice cream only requires 3 ingredients, a blender, and time to freeze. Very easy!
To make the base ice cream, we’re going to be mixing together lite coconut milk, cocoa powder, and powdered sugar substitute (can use regular powdered sugar as well).
I’ve experimented with different types of milk here, and trust me, coconut milk was by far the best! Almond or cashew milk is going to result in a final consistency that is closer to an Italian ice than ice cream, and that’s not what we are after.
Coconut milk doesn’t contain any protein, but that actually helps to create a smoother consistency along with the fat content it provides. Don’t worry, we’re sneaking some protein in with our peanut butter cookie dough, so it all balances out.
All you need to do here is mix up all 3 ingredients, then add them to a large freezer bag or ice cube tray.
I like going with the freezer bag method, mostly because it makes cleanup very easy (you can just throw the bag out when you’re done). That being said, you can just as easily fill an ice cube tray with your mixture and it will work just as well.
We’re going to freeze this mixture, which will likely take 8-10 hours. I like to just leave it overnight to be 100% sure it’s completely frozen.
PS: Don’t worry if there are still small amounts of cocoa powder that didn’t completely dissolve (like you can see in my photo). They’ll get blended right into the final ice cream no problem.
Once frozen, break up your mixture (you should be able to just break it apart with your hands, but if it froze too thick, you can drop it on the ground to let gravity do the work for you) and add to your food processor.
Blend it up for about 30 seconds until there are no large chunks left. At this point, it’s going to be quite crumbly…
Add roughly 2 tablespoons of milk and scrape down the sides, then blend once again on high until everything comes together.
Note that you may need slightly more milk, which is totally fine. Just don’t get too heavy-handed with it, because we want this ice cream to stay nice and thick. Add small amounts at a time and you’ll be safe!
You should be left with a very thick ice cream, which is exactly what we want.
How to make dairy-free peanut butter cookie dough
With this recipe, you can go with any mix-ins that you’d like. I chose to go the peanut butter route, but you can also go with Fudge Brownies or Sugar Cookies (both dairy-free) as well.
If you’re not dairy-free, I’d recommend mixing in some No-Bake Protein Cookies or even some Protein Churro Bites.
To make a super easy peanut butter cookie dough, all we need to do is mix up powdered peanut butter, vanilla protein powder, and powdered sugar.
Add 2 tablespoons of milk, and it should turn into a nice thick cookie dough!
You don’t necessarily have to use any protein powder to make these, but it is what transforms the powdered peanut butter into a dough. If you just use powdered peanut butter with powdered sugar, you will be left with more of a crumbly peanut butter mixture, similar to what you’d find inside of a Reese’s Cup. Which, now that I say it, doesn’t sound so bad at all.
If you need a recommendation for a solid dairy-free protein powder, I used “Flex” vegan protein powder, which is one of the better plant-based proteins I have tried! Most of them tend to taste like dirt to me, so the fact that I actually enjoy that one is quite a big deal for me.
Once everything is mixed up, you’ll want to add the cookie dough to the fridge for about an hour or so. If you eat it right away, the flavor isn’t nearly as good. I never really understand what the science is behind no-bake recipes tasting better as they sit, but it seems to always be true.
My recommendation is to just make the cookie dough when you first make the ice cream mixture, that way you can just store the cookie dough in the fridge until you’re ready to blend the ice cream.
You can whip the cookie dough up when you’re ready to assemble, but it’s nice to have everything ready to go all at the same time.
Assembling your Dairy-Free Blizzard
Okay, we have our dairy-free ice cream and our cookie dough- now it’s time to put it all together.
Simply break off pieces of the cookie dough and roll ’em up in your hand to create cookie dough bites. You can leave these as large chunks or crumble ’em up if you prefer smaller pieces.
Save a little bit of the cookie dough to crumble on top before serving, though! We’re all about the aesthetic here, and having extra cookie dough as a topping goes a long way.
Add some dark chocolate chips to the ice cream as well, then give everything a quick mix with a silicone spatula or spoon (note that we’re not blending this all together, just a gentle mix).
Pour the ice cream out into cups or bowls, crumble the remaining peanut butter cookie dough on top, along with some extra chocolate chips for good measure, and enjoy!
If you don’t want to serve these up in cups or bowls, you can scoop this ice cream into cones as well. When I made mine, it was thick enough to use my ice cream scoop with, although definitely slightly softer than I’d prefer for an ice cream scoop:
Since the dairy-free ice cream is on the thick side, but not quite firm enough for scoops, you can probably get away with the piping-bag method. I didn’t try this, but if you were to add this ice cream to a large freezer bag and cut the tip off of the bag (like you would do with icing), you should be able to squeeze it right into a cone as if it were soft-serve ice cream!
Can you freeze these dairy-free blizzards for later?
Short answer: kind of.
If you add these blizzards back to the freezer, they will freeze rock-hard. I tried this and they became inedible, unfortunately.
You can certainly add the blizzards back to the freezer if you need to thicken them up a bit after blending, but 30 minutes to an hour is all you’ll need.
If you need to save these for another day, I recommend just keeping the original mixture (in the freezer bag or ice cube tray) in your freezer until you are ready to make these. When you return the finished Blizzard back to the freezer, it essentially returns back to that original form anyway, which means you’ll end up needing to blend it up once more.
Instead, let the mixture sit in the freezer until you want to whip one of these up! In fact, that actually works very well if you’re into meal-prepping (and assuming you have the freezer space to save ’em).
Ingredients
Chocolate Ice Cream
- 13.5oz (1 Small Can) Lite Coconut Milk
- 50g Powdered Sugar Substitute
- 10g Unsweetened Cocoa Powder
- 2 Tbsp Milk of Your Choice (any milk will work)
PB Cookie Dough
Instructions
- Shake up the can of coconut milk and then empty it out into a large bowl. Add the powdered sugar and cocoa powder, then whisk everything together until fully combined.
- Pour the mixture into a large freezer bag or ice cube tray (I prefer the bag method, but either works!)
- Allow the mixture to fully freeze. This should take at least 5-6 hours, but I find leaving it overnight to be the safest method.
- While the mixture freezes, you can prep the peanut butter cookie dough. Add the powdered peanut butter to a bowl along with powdered sugar and protein powder. Add 2 tablespoons of milk (any milk will work) and mix that up until it forms a ball of dough. Place in the fridge to thicken until it’s time to make the ice cream.
- Once your ice cream mixture is fully frozen, remove the bag from the freezer and break it up into small pieces to be able to add them into your blender or food processor. If you used an ice cube tray, you’re good to go already.
- Blend this up on high for about 30 seconds or so. At this point, the mixture will be crumbly and will not resemble ice cream. Add roughly 2 tablespoons of milk (any milk works in this case, it doesn’t need to be coconut milk) to the blender and blend on high until it all comes together and blends into a smooth ice cream consistency. Note that you can add an extra tablespoon or so of milk if it’s not coming together for ya, just be careful you don’t add too much because we want to keep this very thick.
- Once done, break apart your peanut butter cookie dough and add pieces to your ice cream, leaving a little bit leftover to crumble on top at the end. Add the chocolate chips as well, then fold everything together.
- Divide into 2 cups or bowls, top with the remaining dough and some extra chocolate chips if desired, and enjoy!
Notes
- You don’t have to add protein powder to your peanut butter cookie dough, but I like the idea of having some protein in this ice cream. If you omit it, the cookie dough will definitely be more crumbly and not quite the same as a traditional soft cookie dough, but it should still work.
- You can turn this into chocolate fudge ice cream by using my No-Bake Vegan Brownies!
- Note that I do not count sugar substitutes as part of my carb totals.
- If you prefer vanilla ice cream or want to go the dairy route, check out my original no-churn ice cream recipe.
Recommended Products
As an Amazon Associate and member of other affiliate programs, I earn from qualifying purchases.
Nutrition Information
Yield 2
Serving Size Half of Recipe (1 Blizzard)
Amount Per Serving
Calories 250Total Fat 17gCarbohydrates 17.5gFiber 6gSugar 4gProtein 14g


