We should officially rename December to “Cinnamon Roll Month” because there’s truly nothing better than a warm, gooey cinnamon roll right now. But what if I took my famous cinnamon roll recipe and turned it into something even more festive?!
Okay, I DID. I actually first posted this gorgeous cinnamon roll snowflake on Instagram last year, and knew that I had to share it on the blog the next holiday season. A year later, and here she is in all of her glory! Trust me when I say that this snowflake cinnamon roll is easier to make than you think. Once you’ve mastered the rolls themselves, you’ll just shape the dough differently to create this beautiful shape!
I’ve included tons of step-by-step photos so that you can bake this up with success. Your friends and family will absolutely swoon over this holiday brunch treat!

Everything you’ll need to make this cinnamon roll snowflake
We’re actually using everything in my famous cinnamon roll recipe and simply shaping it into a snowflake! Here’s what you’ll need:
- Milk: I always recommend using whole milk or 2% milk, but see below for dairy-free options.
- Yeast: I like to use quick rise or instant yeast to help all of my cinnamon rolls rise faster, but you can also use active dry yeast. Yes, they’re different! Scroll down to get tips for using yeast in this recipe.
- Granulated sugar: we’re sweetening with granulated sugar, which also helps to activate the yeast.
- Butter: I like using salted butter in my cinnamon rolls, but you can always use unsalted. You’ll need it for the dough, filling, and icing.
- Eggs: we’re using 1 egg and 1 egg yolk to give the dough moisture and richness.
- Bread flour: using bread flour is really what will give the cinnamon roll snowflake its light, fluffy-yet-chewy texture due to the higher protein level.
- For the filling: you’ll rub softened butter, brown sugar (I love dark brown sugar), and cinnamon into the dough after you roll it out.
- For the icing: we’re still making a delicious cream cheese frosting for the snowflake made with cream cheese, butter, powdered sugar, and vanilla extract. You can either ice the snowflake or just sprinkle it with powdered sugar and make the icing to use as a dip!
Can I make it dairy-free or gluten-free?
- To make it dairy-free: use dairy-free milk, vegan butter, and vegan cream cheese.
- I cannot recommend a flour substitute to keep this snowflake cinnamon roll gluten-free.
Looking for a vegan option?
Make the dough from my Vegan Banana Bread Cinnamon Rolls to make a yummy, vegan banana bread cinnamon roll snowflake!

Choose from 2 types of yeast
For all of my cinnamon roll recipes (and other yeasted breads), it’s important to know exactly which yeast you’re using before you start baking. There are 2 types, and they behave differently:
- Active dry yeast: this type of yeast must be dissolved in liquid, or also what’s known as being “proofed” before it’s added to the rest of the dough ingredients. You’ll know this type of yeast is activated when little bubbles start to appear in the liquid that you dissolve the yeast in (for this recipe, it’s warm milk).
- Instant yeast: also known as quick rise yeast (this is the brand I use and love!), and what we are using for this cinnamon roll snowflake recipe. It can be added to the dough without any ‘proofing’ required, so you don’t need to sit and watch the yeast to make sure it bubbles. However, you’ll still want to dissolve it in a little bit of milk and sugar to help get it started.
Yes, we’re weighing our ingredients
I highly recommend weighing your ingredients with a kitchen scale to ensure that your baked goods (and this snowflake) turn out perfectly every time. This is how I test my recipes to ensure accuracy.
Plus, it helps with cleanup because you won’t have to wash tons of extra bowls, measuring cups, etc.!
How to make a cinnamon roll snowflake (step-by-step)
Step 1: Start by mixing the cinnamon roll dough in this recipe, and then let it rise in a bowl until it doubles in size (this would be the first rise).
Step 2: Mix your brown sugar and cinnamon together in a small bowl. This will be used later for the filling.

Step 3: Instead of rolling all of the dough out, divide the dough into 4 equal-sized pieces.

Step 4: Roll out each of the pieces into about an 8-inch circle. It doesn’t have to be perfect, but they should be roughly the same size as they will all be stacked.

Step 5: Place one of the dough circles onto a baking sheet lined with parchment paper and rub 2 tablespoons of butter on top.

Step 6: Pat 3 tablespoons of the brown sugar and cinnamon mixture into the butter. Repeat by adding the second dough circle on top of the first one, spreading butter, and rubbing in the cinnamon sugar, then repeat once more with the third dough circle.

Step 7: Top with the fourth, final dough circle, and do not add butter or cinnamon sugar. Place a small metal cookie cutter in the center of the dough.
*The cookie cutter is there as a guide so that you don’t cut through the center of the dough, and it will create a cute middle to your snowflake!

Step 8: Cut the dough towards you into 4 equal pieces, starting at the center where the cookie cutter is. Think of it as cutting at the 12, 3, 6, and 9 of a clock.

Step 9: Cut each of the 4 pieces in half so that you have 8 pieces total.

Step 10: Cut each of those 8 pieces in half so that you have 16 pieces.

Step 11: Grab two sections of dough and carefully twist them away from each other about 2 times.

Step 12: Pinch the ends of those two twisted sections together. Repeat all around the circle.

Step 13: Brush the whole snowflake with milk or heavy cream, then cover the whole snowflake with a warm towel to let it rise while you preheat your oven.

Step 14: Bake the snowflake until lightly golden brown, then spread half of the cream cheese frosting on top, or just sprinkle it with powdered sugar and use the frosting as a yummy dip!
Make this snowflake cinnamon roll the night before
Save time on Christmas morning by prepping the snowflake the night before! Here’s how to do it:
- Follow the recipe through Step 6, after you’ve twisted the dough into your snowflake shape and brushed it with milk.
- Cover the entire snowflake tightly with plastic wrap and a towel, and place it in the fridge overnight or up to 18 hours.
- In the morning, remove from the fridge 30 to 45 minutes before baking while preheating the oven, and then bake as directed.
Cinnamon roll snowflake FAQs
- Can I use all-purpose flour? The snowflake will still work with all-purpose flour, but I HIGHLY recommend sticking with bread flour to get that beautiful, fluffy texture.
- Can I double the recipe? Yes, you can double the recipe if you want to make TWO separate snowflakes.
- What if my dough is too sticky to knead? Simply add a little more flour, about a tablespoon at a time, until it’s easier to work with.
- Can I add nuts? Yes, yum! You can sprinkle them onto each layer of the butter/sugar/cinnamon mixture before slicing and twisting into your snowflake.
Storing tips
Feel free to store the baked snowflake cinnamon roll covered at room temp for 1-2 hours, then wrap completely or transfer pieces to an airtight container and store in the refrigerator for up to 5 days. Reheat pieces in the microwave to get them soft and gooey again!
How to freeze this snowflake cinnamon roll
- To freeze before baking: freeze the full snowflake right after you’ve shaped it. Place it into a pan and cover it well, then place it in the freezer. When you are ready to bake, let the dough thaw in the fridge — preferably overnight — then put it in a warm spot for 30 minutes to 1 hour before baking to activate the second rise. Bake the snowflake as directed.
- To freeze after baking: allow the cinnamon roll snowflake to come to room temperature after baking, then wrap it well and freeze it for up to 3 months. When ready to eat, defrost the snowflake at room temperature, then warm it in the oven at 350 degrees F for 10-15 minutes.

Tools you’ll need
Get all of my kitchen essentials here!
More brunch treats you’ll love
Get all of our delicious breakfast & brunch recipes here!
I hope you love this cinnamon roll snowflake! If you make it, be sure to leave a comment and a rating so I know how you liked it. Enjoy, xo!
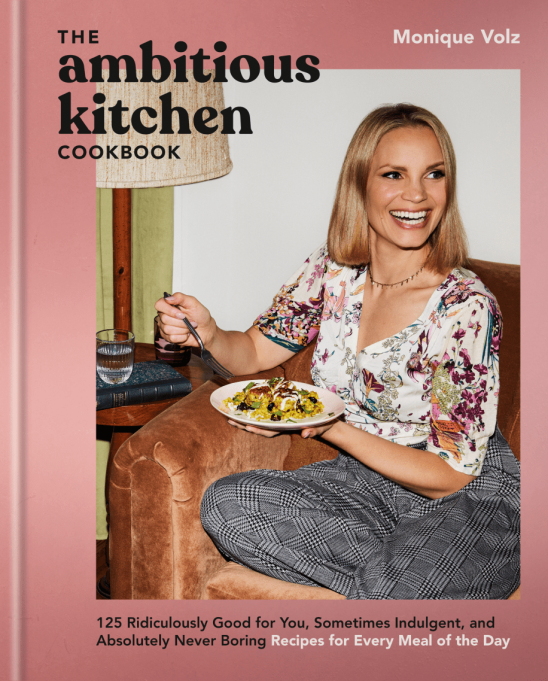
The
Ambitious Kitchen
Cookbook
125 Ridiculously Good For You, Sometimes Indulgent, and Absolutely Never Boring Recipes for Every Meal of the Day
Festive cinnamon roll snowflake sliced, twisted, and baked for the perfect holiday treat! Get easy, step-by-step instructions for turning my famous cinnamon roll dough into a beautiful snowflake. Such a fun baking project to surprise and delight loved ones during the holiday season!
Ingredients
- Dough
- 1 recipe for cinnamon roll dough
- Filling and topping
- ⅔ cup (142 grams) packed dark brown sugar
- 1 ½ tablespoons ground cinnamon
- 6 tablespoons (85 grams) salted butter, softened
- 3 tablespoons or heavy cream, for brushing
- Frosting
- 4 oz (112 grams) cream cheese, softened
- ¾ cup (85 grams) powdered sugar
- 3 tablespoons salted butter, softened
- ½ teaspoon vanilla extract
Instructions
-
Make the dough: Make my cinnamon roll dough and allow it to rise until doubled in size as directed (also known as the first rise).
-
Make the cinnamon sugar filling: In a medium bowl, add the brown sugar and cinnamon together and stir with a fork until combined. Set aside.
-
After the first rise of the dough, divide the dough into 4 equal pieces. Roll out each of those pieces into an approximate 8 inch circle. It doesn’t have to be perfect but they should be roughly the same size.
-
Roll out the dough: Line a large baking sheet with parchment paper and place 1 of the 8-inch dough circles on it. Spread 2 tablespoons of softened butter evenly over the top, then evenly sprinkle about 3 heaping tablespoons of the brown sugar cinnamon mixture over the butter and pat the cinnamon sugar into the butter. Repeat with the second dough circle, butter and cinnamon sugar, and again with the third dough circle, butter and cinnamon sugar. Finally, top with the fourth (and final) dough circle (do not add butter or cinnamon sugar on top of the last one).
-
Cut the dough: Place a small metal cookie cutter in the center of the dough. This will be your cutting guide so you don’t cut all the way through the middle of the dough. Cutting from the edge of the cookie cutter towards you, cut the dough into 4 equal pieces. Use 12 o’clock, 3, 6 and 9 as your guide. Once you have those 4 cuts, cut each of those sections in half for a total of 8 sections. Then cut those 8 sections in half again for a total of 16 even sections.
-
Assemble the snowflake: Next grab two pieces of the dough at a time and twist away from each other about 2 times. Then pinch the ends of the dough together. Repeat the process all the way around the circle. Lightly brush the entire dough with milk or heavy cream. Once done, cover with a warm towel to allow it to rise a bit while the oven preheats.
-
Preheat the oven: Preheat the oven to 350 degrees F.
-
Bake: Once preheated, bake the snowflake in the oven for 25 to 30 minutes until nice and lightly golden brown.
-
Prepare the cream cheese frosting: In the bowl of a stand mixer fitted with the whisk attachment, combine the cream cheese, powdered sugar, butter, and vanilla. Beat on low speed for 30 seconds, then increase to medium-high speed until smooth and fluffy, 1 to 2 minutes. (Alternatively, whisk the frosting by hand.)
-
Frost or top the snowflake: Add about half of the frosting on top of the snowflake if desired or just dust with powdered sugar and use frosting for dipping the pieces. Serves 8 to 10.
Recipe Notes
To make overnight:
- Follow the recipe through Step 6, after you’ve twisted the dough into your snowflake shape and brushed it with milk.
- Cover the entire snowflake tightly with plastic wrap and a towel, and place it in the fridge overnight or up to 18 hours.
- In the morning, remove from the fridge 30 to 45 minutes before baking, preheat the oven, and then bake as directed.
See the full post for a visual, step-by-step guide, tips, FAQs, and more.
Recipe by: Monique Volz // Ambitious Kitchen | Photography by Eat Love Eats